


On paper, a smart thermostat is an excellent deal, a way to gain newfound savings while making home heating and cooling easier to manage than ever through AI and remote sensors. In practice, a worry frequently arises — can you install it yourself or do you need to hire a pro?
Fortunately, our CNET experts have spent years installing thermostats and coaching others through it. While it’s slightly more complicated than wiring a video doorbell, most homeowners can still handle it DIY. All you’ll need is a screwdriver, your phone and a bit of time … plus a guide like ours.
When I reached out to the nonprofit Energy Trust of Oregon, they gave me a few pointers on how to start: “You’ll want to make sure the model is compatible with your heating and cooling system,” its spokesperson said. “That’s really important, especially if you have what’s known as a multi-stage system or one that lets you adjust the amount of air blowing into your home with settings like low, medium and high.”
Once you’re ready, we have the details on how this works, plus the nuts and bolts of the installation itself. Here’s what to do and options if you’d rather not bother.
Read more: Best Smart Thermostats: Tested and Reviewed in 2025
Check compatibility before you buy a smart thermostat
In addition to checking if you have a multi-stage climate system, there are a few other important compatibility checks that you need to make before you click the buy button on a new thermostat. You must install smart thermostats in the same location as your old thermostat and the wiring there comes with requirements that can vary a bit from home to home. Pay close attention to:
- Whether the thermostat needs a C-wire: The C or common wire (usually clearly labeled) is a low-voltage wire that can provide power to a thermostat. Some thermostats require a C-wire to work. Others, like the Nest Learning Thermostat, don’t need a C-wire. Learn if your thermostat pick needs one and if your home has one. Sometimes, you can install an adapter (Ecobee models even offer a kit for this) to overcome this problem but that’s a higher level of electrical work.
- Whether the thermostat needs to connect to high-voltage wiring: Some thermostats need to control high-voltage appliances, notably large electric heaters. But the average smart thermostat can’t handle high-voltage current. If you have big electric baseboards or an electric furnace, your home may not be ready for a smart thermostat. Thermostats are usually labeled 120V or higher, or have L1/L2 contact points if they’re high voltage.
- Whether the thermostat has stranded wires: Some smart thermostats, like Nest’s, don’t support stranded wire connections, which are typically rare.
Companies do offer online compatibility checks to help with this process. You’ll probably have to detach your old thermostat and take a look at the wiring to know for certain — but that’s good practice.
Unbox your new thermostat and dismount your old model
Examine the pieces of your new thermostat. You should have a mounting plate, which screws to the wall, and the thermostat face, which attaches to the mounting plate (other accessories can vary). Pay special attention to the mounting plate contact points, which is where you’ll be connecting the wires.
Disconnect the power to the thermostat at your breaker box. Breakers are usually labeled with heating/cooling/HVAC labels, which should include your thermostat, so shut all these off. If your temperature has manual controls, adjust them to force the system to turn on, and wait a few minutes to see if it does (it should not). You want to make certain that every wire in the thermostat is dead before you continue.
If you haven’t already disconnected your old thermostat from the wall, detach the cover gently. Leave the wires connected to contacts — do not remove them at this time!
Photograph and document your wiring before disconnecting
Use your phone or get a friend to help and take a photo of the wiring in the old thermostat’s contacts, with names like Y1, G, AQ-/+, W1, and so on. Make sure the photo has a clear view of the contacts and their labels (you can take more than one).
You can also label individual wires with bits of tape but this is more time consuming and usually recommended if you have wires that are the same colors, or you’re colorblind and prefer to tag the wires. Good news — many smart thermostat kits also come with little sticky labels you can use for this purpose.
Unscrew and remove the old thermostat and screw in the new mounting plate
Disconnect the wires (some use screw contacts, others use tabs), then unscrew the old mounting plate entirely (if necessary), and remove the old thermostat entirely. Guide all the wires through the central hole of the new thermostat mounting place, and screw the plate in using its screws. Use a screwdriver, not a drill. At this point, you may want to bring out a lever and make sure the thermostat is level before you screw it all the way in.
You may have to drill new holes in the wall but smart thermostat companies design their mounting to fit in standard thermostat gaps so this isn’t often a problem. If you do need to drill holes, use a stud finder with wire-sensing technology to search the gap, so you don’t drill into any of the thermostat’s wires.
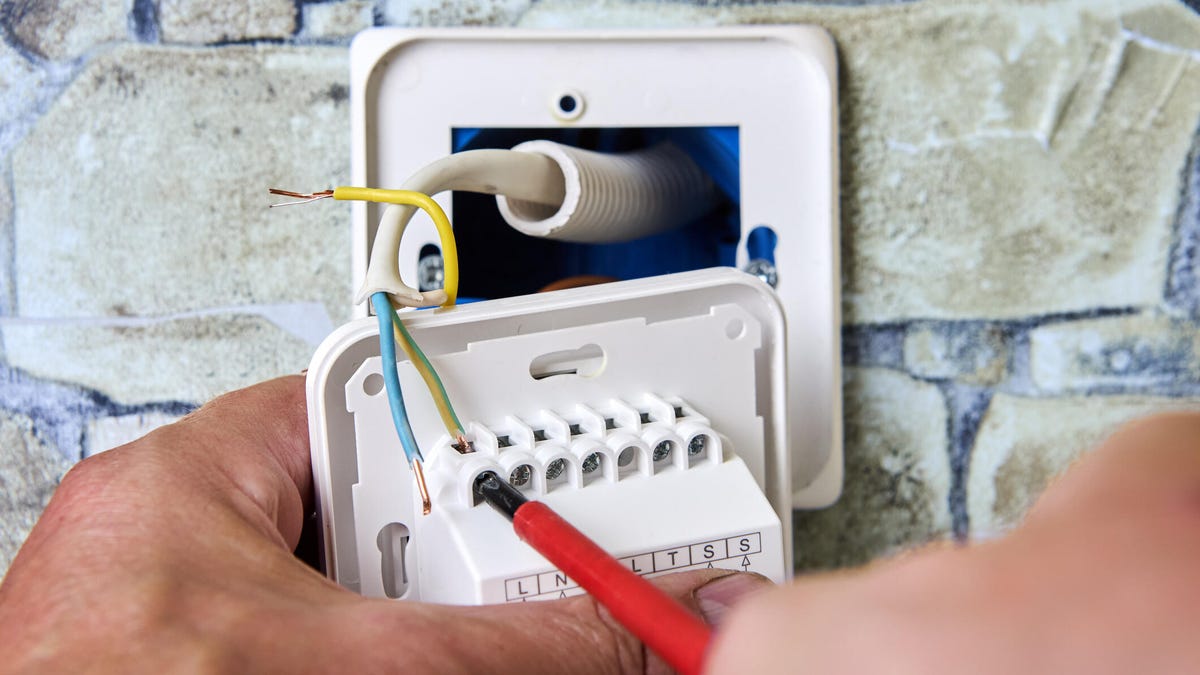
Reconnect the wires to the correct contacts and mount the thermostat
With the mounting plate screwed in, you are ready to connect the wires to the proper contacts. Consult the photos you took or your tags, putting each wire color into the proper contact and making sure it is fully connected. If the wires are especially tangled, organize them a bit before connecting. Sometimes wires will have different labels than the new contact points: Here’s a guide on what wire names mean and another handy guide on which slot wires go into if labels don’t quite match.
Your wires shouldn’t usually require stripping or other maintenance but if they’re in poor condition (cracked, badly split, etc.) you may want to clip and strip with a pair of pliers before this step.
With all wires in the right contact points, connect the thermostat face to the mounting plate. The thermostat should lock in place so it’s fully connected on all sides to the plate.
Connect the new thermostat to Wi-Fi to start the setup
With the hard work done, turn your power back on and power up the thermostat with a touch or twist so it powers on. Head to your app and continue the setup procedure, inputting your Wi-Fi password when directed. Your thermostat will probably have to apply a few firmware updates at this time.
Now you’re ready to start exploring thermostat features, setting new schedules and choosing settings to help it learn your habits and start saving money.
Important note: The new thermostat may be a different size than the old thermostat, which means it may leave unpainted or unaged wall marks behind when you’re done. You can usually fix this with a bit of house paint or by using a thermostat trim kit that matches your wall well.
What if I’m not interested in installing my thermostat myself?
You don’t have to — smart thermostats make it very simple to connect with a local electrician at the time of purchase and arrange an installation date, all at once. It can cost up to $200 on average, depending largely on your location.
If you want to save, look around for deals on a professional installation. Your local electricians may offer these deals in certain seasons. I’ve also seen some brands, like Nest, offer a free installation with the purchase of a new model.
For more information, jump on over to our pieces on the best smart thermostat settings for spring, how to save using home tech and how much money home security devices can save you each month.
Read the full article here


