


Homeowners naturally gravitate toward video doorbells, which act as both doorbells and security cameras while allowing you to get alerts about packages, spot porch pirates and hold audio conversations no matter where you are.
However, if you’re nabbing your first video doorbell from popular companies like Google Nest or Ring, you still need to set it up and get it ready for action. That includes mounting the doorbell correctly, connecting it to additional devices and getting your video storage ready. These steps, which should only take an hour or two in all, cover everything you’ll need.
Read more: The Best Cheap Video Doorbells
Installation: Wiring vs. battery
Smart doorbells are either wired or battery-powered, or give you an option for either. Wired models use your existing doorbell’s wiring to get power, while most wireless options have rechargeable battery packs. Which kind you get will influence how and where you can install it.
Wiring your new doorbell using your old doorbell’s wires sounds complicated, but it’s actually very simple and companies give you complete guides on how to do it. Most homes will automatically support video doorbells, which usually require 16 to 24 volts (you can see the full chart for Nest doorbells here, for example). With a supported doorbell, steps are easy:
- Use your breakers to turn off power to the front door area.
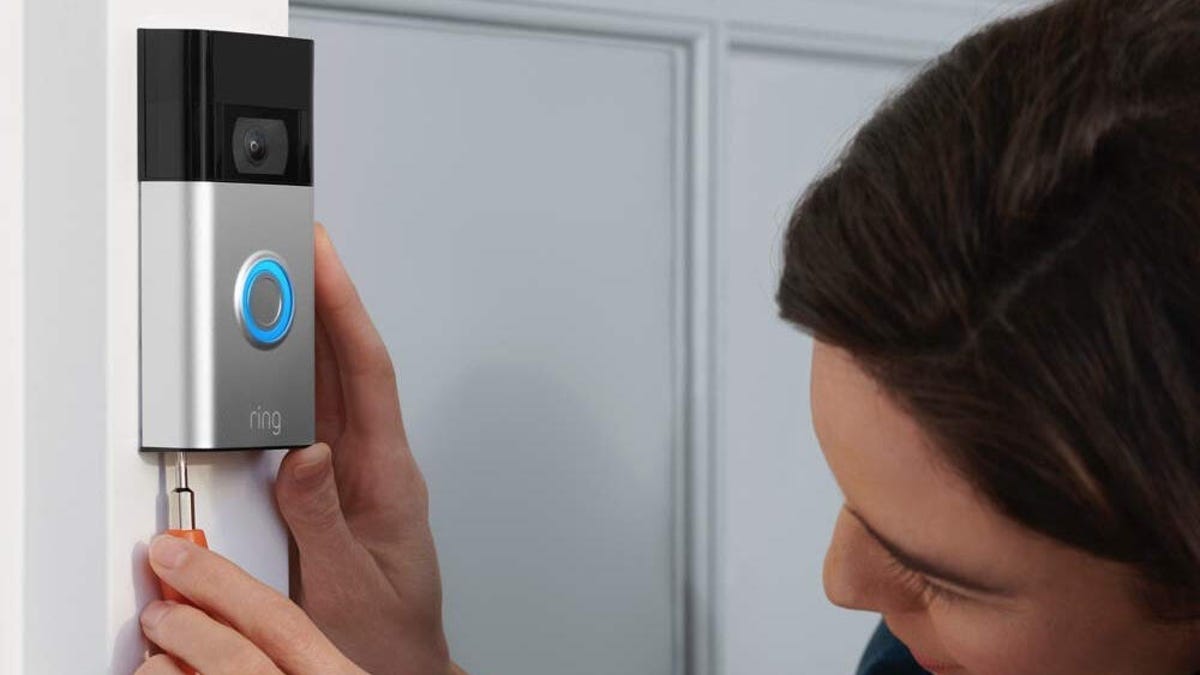
- Remove your old doorbell. This is usually easy with a screwdriver and some careful work.
- Once the doorbell has parted ways with the wall, use your screwdriver or fingers to carefully detach the wires from the back. There will be two to three wires. If the wires are short, use a bit of duct tape to secure them to the wall so they don’t get lost.
- Use the doorbells app to set up a new device and choose your doorbell model. At this point, most apps will give you a walkthrough on how to position your doorbell and where to insert and secure the wires when it’s time.
- Secure your new doorbell. This may require drilling new holes for screws depending on the size of the doorbell.
- If your doorbell wiring is looking old or sparse, now is the time to strip the wires a little so more wiring is exposed, and ready to be properly secured.
- If your doorbell comes with a chime, it may have additional wiring instructions for the chime section inside your home.
Or, you can skip the wiring parts altogether and choose a battery option, which allows you to keep your old doorbell and install the new model in whatever spot works best for your. With my tough fiber cement siding, it was easiest for me to install my primary video doorbell on the wood trim on the opposite side of the door from my old doorbell. In these cases, all you need to do is screw in the mounting plate in the right position.
Position the doorbell about four feet high
If you have options where to place your doorbell, always mount it about four feet from the base of your door (not the bottom of the porch). That gives the doorbell the right angle to capture packages set in front of your door as well as the people approaching. Never set a video doorbell as high as a traditional security camera.
Use a wedge to angle the doorbell if necessary
Many video doorbells come with a wedge add-on to install on the mount plate. This wedge angles your doorbell outward, and for many front porches its a vital addition. For example, if my Nest Doorbell faced straight ahead, the camera would be half-blocked by a porch wall. With the wedge, my doorbell angles out and captures the whole porch perfectly.
These wedges are typically included with the doorbell kit and screw in at the same time you are mounting the plate. Don’t be afraid to make adjustments or add a wedge as you experiment with doorbell placement and watch the live video.
Set up answer and motion notifications
When someone approaches your home or presses the button on your smart doorbell, you can get a notification on your phone. Then, you can open the doorbell’s app and see who’s at the door and talk to them. It’s especially handy to give instructions, ask questions, dismiss unwanted callers and even yell at approaching porch pirates.
The Nest Doorbell also has prerecorded Quick Responses you can use if you don’t want to talk.:
- “You can leave it.”
- “We’ll be right there.”
- “No one can come to the door.”
Alexa-supporting doorbells like those from Ring allow you to set very similar automatic responses with Alexa. Swann Security’s doorbell even has more advanced conversational AI that can answer questions about who’s living at this address and more.
Next, you’ll want to dive deeper into settings and set motion and object recognition alerts so you only get the alerts you want. This often comes in a couple of different steps:
- Switch alerts on or off to only get the alerts you want. You may be able to switch off human detection and only get package alerts, for example or switch off doorbell press alerts but get human detection alerts. Customize based on what you want to know about.
- Adjust motion detection sensitivity. Start somewhere in the middle and raise or lower sensitivity depending on performance.
- Enable face profiles if necessary. With a subscription, more and more video doorbells are offering the ability to create face profiles out of recorded people so the doorbell knows when that person comes again. Yes, there are legal issues with this but it’s also a handy way to limit doorbell notifications to only strangers.
Connect to your home hub
If you have a Nest Hub, an Amazon Echo, you can connect your doorbell to it so you can view your front-door camera on your TV or Echo Show and use the smart hub (the Home or Echo) to answer the door remotely.
To use Alexa to control the camera, all you need to do is enable the Ring or Nest Camera Alexa skill and set it up through the Alexa app.
With a Google Home, you’ll need to connect the doorbell to your hub. Here’s how:
- Open the Google Home app
- Tap Add > Set up new device > Have something already set up?
- Choose Nest or Ring from the list of devices
- Follow the onscreen steps on your phone to pair the devices
- Tap Allow > Done
- Open the Google Home app
- Tap Home > Doorbell > Settings > Name
- Name your doorbell and tap Save
Adjust motion-detection sensitivity
Most smart doorbells will start ringing as soon as people approach your front door, before they even press the button. If your door is close to a sidewalk with a lot of foot traffic, you might get frequent alerts when someone merely walks past your home.
The fix? Adjust the doorbell’s motion-detection sensitivity. Both Nest and Ring let you set zones of space to monitor for activity, as do most other doorbells.
A doorbell zone is the area the camera will focus on to detect movement. In some cases you need a subscription to enable motion zones, but many offer them for free. These steps work for Nest but can apply generally to many other doorbells, too.
- Open the app and choose your camera
- Tap Settings > Activity Zones > Create Zone
- Turn your phone so it’s in landscape mode
- Tap and drag the zone on your screen to move it around
- Drag the eight dots around the zone’s edge to change its shape
- Tap the Pencil icon, give your zone a name, then tap the Checkmark icon
- Tap the new Checkmark icon to save your zone
Set up video storage management
With video doorbells comes the option for storing your captured videos. We highly recommend it: You don’t want videos to be lost in the ether, especially if you want to use them for face profiles or to capture evidence if a porch pirate.
Doorbell video storage presents two options. The first is cloud storage, which uploads the video to the cloud for a certain amount of time (anywhere from two week to six months) where you can review it, share it or download it as necessary. The problem is that cloud storage introduces extra security risks and typically requires a subscription, like the $5 Ring subscription or the $8 Arlo plan. Nest offers cloud storage for free, but only for three hours, so you’ll have to act quickly.
Your other option is onboard storage, typically via a microSD card that’s sometimes included with purchase. Lorex and Eufy both offer video doorbells with this option, as does the affordable TP-Link Tapo Video Doorbell ($50). The downside is that you are limited by the data the card can hold, so you’ll have to go in and delete videos after a while or set them to automatically delete after a certain time.
What’s the best choice? That depends on your preference. Cloud storage costs money but it’s very convenient, while onboard storage has a higher upfront cost but is more private and saves money over time. I tend to pay attention to video alerts on my phone, so the free three-hour Nest cloud storage has worked well for me when I’m not testing out subscriptions — plus Nest, has remained largely free of data vulnerabilities.
To review even more options for watching your home, look at our picks for the best DIY home security systems, best wireless home security cameras and best security system options for renters.
Read the full article here


